Our Reglazing Process in Concord, CA
A reglazed finish is only as good as the prep underneath it. The difference between a tub that still looks new in twelve years and one that peels in eighteen months is the work nobody sees — the masking, the etch, the primer. Here is exactly how we resurface a fixture in Concord, from the moment we lay down plastic in a Clayton Valley bathroom to the written warranty we hand you on the way out.
Direct answer
How does bathtub reglazing work?
Reglazing bonds a new finish to your existing tub in seven steps: mask, deep-clean, repair chips and rust, acid-etch or scuff-sand for adhesion, prime, spray several coats of acrylic-urethane, then cure and re-caulk. It's a bonding job, not paint.
How long does the reglazing process take?
Most Concord jobs are 3–5 hours of on-site work in a single visit. The surface dries to the touch in about 24 hours and is ready to use 24–48 hours after the final coat cures. To start the process, book a Concord reglazing visit online or call (510) 746-8748.
Why the steps are in this order
Reglazing is a bonding job, not a painting job. A new coating only sticks if the old surface is clean, repaired and micro-roughened so the primer has something to grab. Every step below exists to set up the one after it, and none of them can be skipped without the finish failing later. That is the single biggest reason a hardware-store kit lasts three years and a properly sprayed job lasts ten to fifteen — the prep, not the can.
The whole sequence happens in one visit, usually 3 to 5 hours of on-site work, then the surface cures on its own. We do the same routine on a 1960s cast-iron tub in Dana Estates, a faded fiberglass shower in Northgate, and a laminate counter in Ygnacio Valley — only the prep method changes for the material.
The seven steps, prep to cure
- Protect and ventilate the room We mask the walls, floor, fixtures and any vents with plastic and painter's tape, set up containment so overspray stays inside the work zone, and get airflow moving. Caulk, drain hardware and the overflow plate come off so we can coat clean edges. A tidy Concord bathroom gets handed back exactly as it was, minus the dated finish.
- Deep-clean the surface Years of soap film, body oils, hard-water scale and old cleaning residue all block adhesion. We strip the fixture with a degreaser and an abrasive scrub, then rinse and dry it completely. On a tub that has been DIY-coated before, this is also where we lift and remove the failed, peeling layer.
- Repair chips, cracks and rust Chips get filled and sanded flush, cracks are bridged and reinforced, and rust spots — common under the drain on old cast-iron tubs around Sun Terrace — are treated and sealed so they cannot bleed back through. We sand each repair level with the surrounding surface so it disappears under the topcoat.
- Etch or scuff-sand for adhesion Porcelain and enamel get an acid or silane etch that micro-roughens the glaze so the primer can bite. Fiberglass and acrylic have no porcelain to etch, so they get scuff-sanded with the correct grit and an adhesion promoter instead. Choosing the right method for the material is what keeps the coating from delaminating.
- Apply the bonding primer A tie-coat primer goes down next as the bridge between the substrate and the topcoat. It is sprayed thin and even, and it has to flash off in the right window before the color coats follow. This layer is invisible in the finished tub but it is doing most of the heavy lifting.
- Spray the acrylic-urethane topcoat We spray several controlled coats of acrylic-urethane in a steady, dust-minimized pattern, building an even film with no runs, no orange-peel texture, and crisp edges. This is the glossy, hard surface you see and use — the same look as a factory tub. Color is white by default or tinted to match your bathroom.
- Cure, re-caulk and hand back The finish dries to the touch in about 24 hours and is ready to use 24 to 48 hours after the last coat. Before we leave we lay a fresh bead of silicone caulk, reinstall the hardware, and give you a written care sheet plus the 5-year warranty. If you asked for a slip-resistant tub floor, that textured bottom goes on in this stage too.
What it looks like in your bathroom
The photos below walk through the same three moments on every job — masking the room, spraying the topcoat under containment, and laying the final caulk line. The whole sequence takes about 4 hours start to finish for a standard tub, and across the 1,215-plus Concord fixtures we have refinished since 2017, roughly 95% are completed in that single same-day visit; only the rare multi-surface or heavy-rust job runs into a second day. The tools and the respirator are not for show; controlling overspray and protecting the surroundings is half of doing this safely in an occupied Concord home.
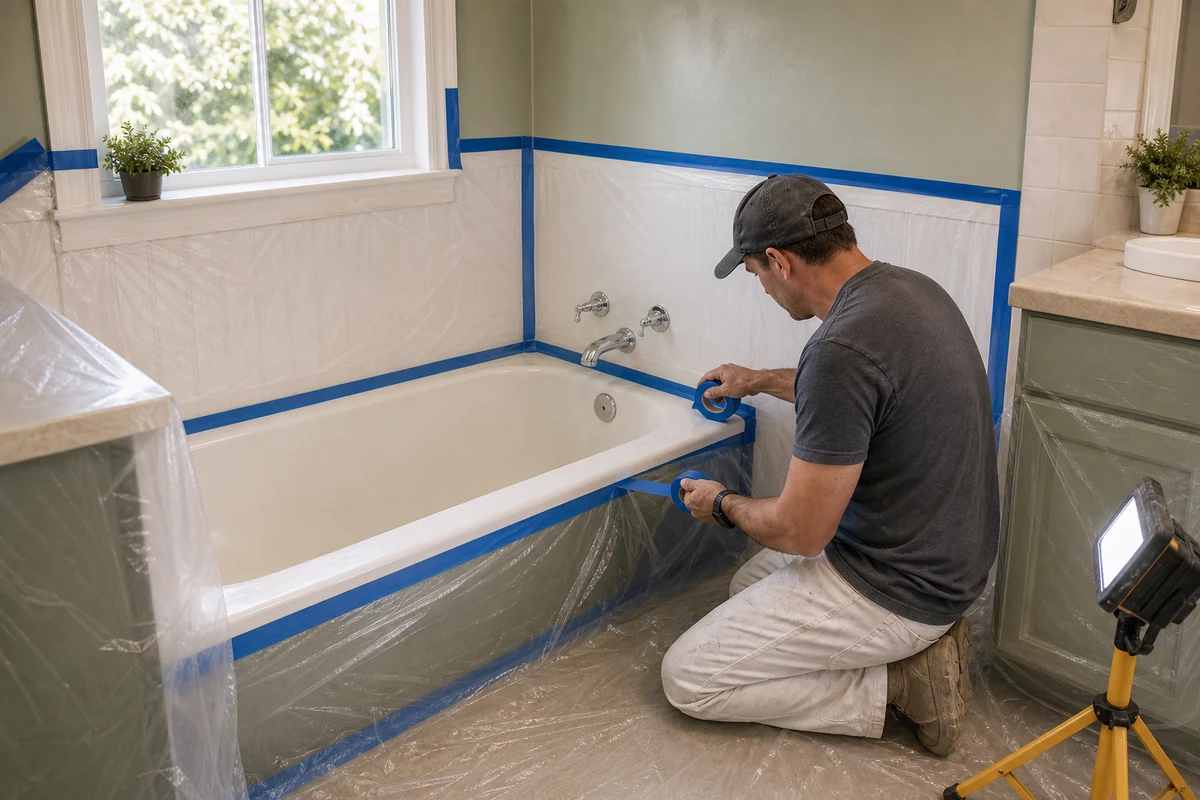
Step 1 — masking and containment in a Concord bathroom.
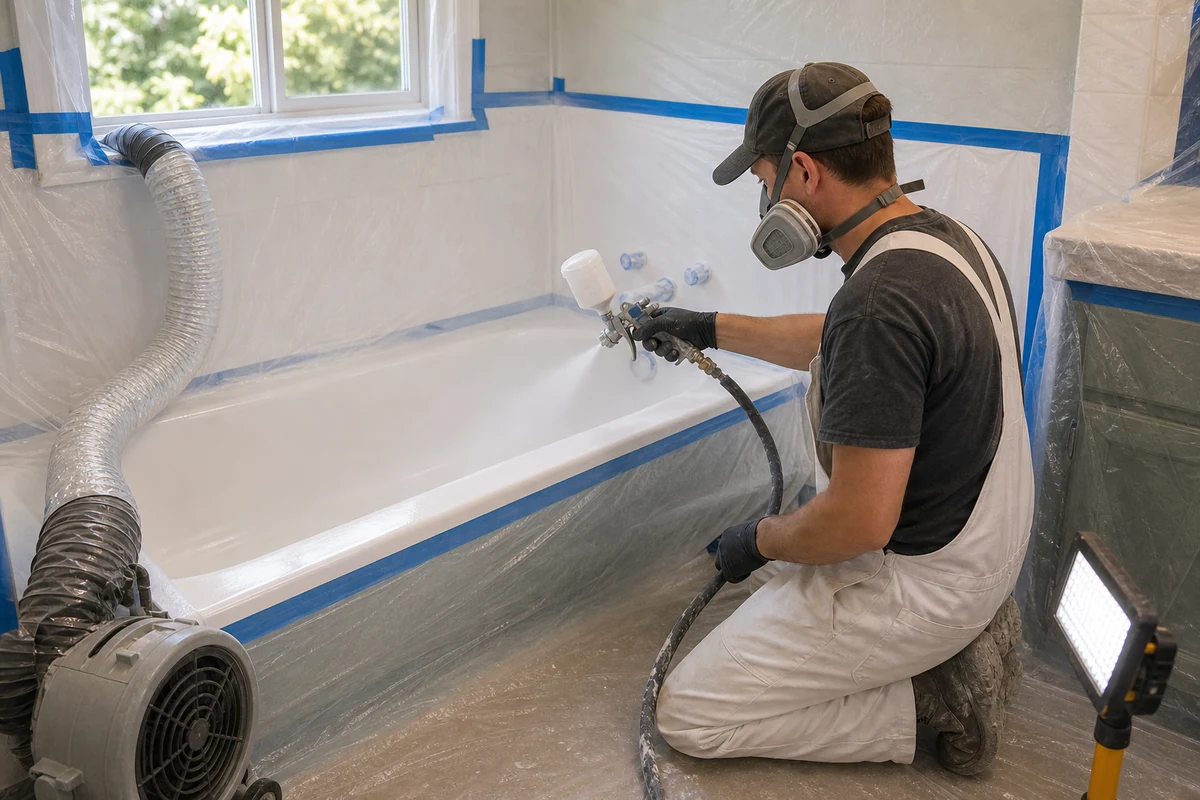
Step 6 — spraying the acrylic-urethane topcoat.
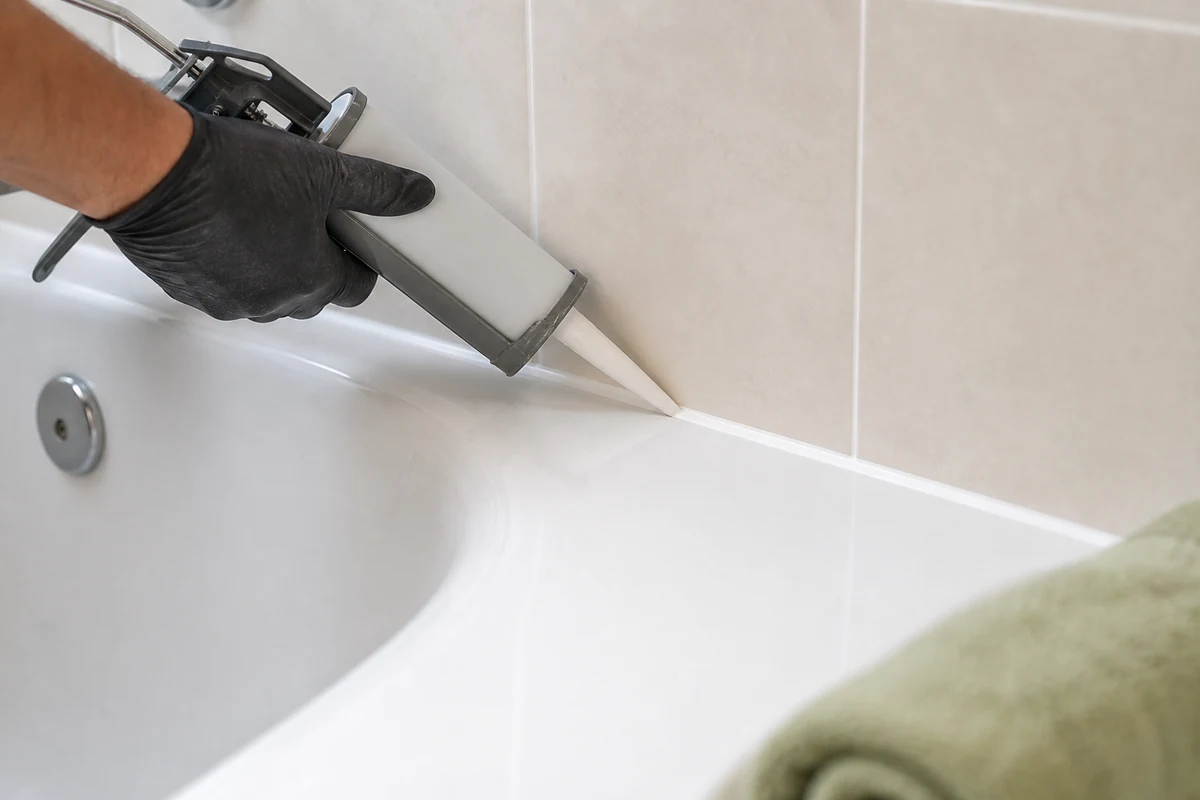
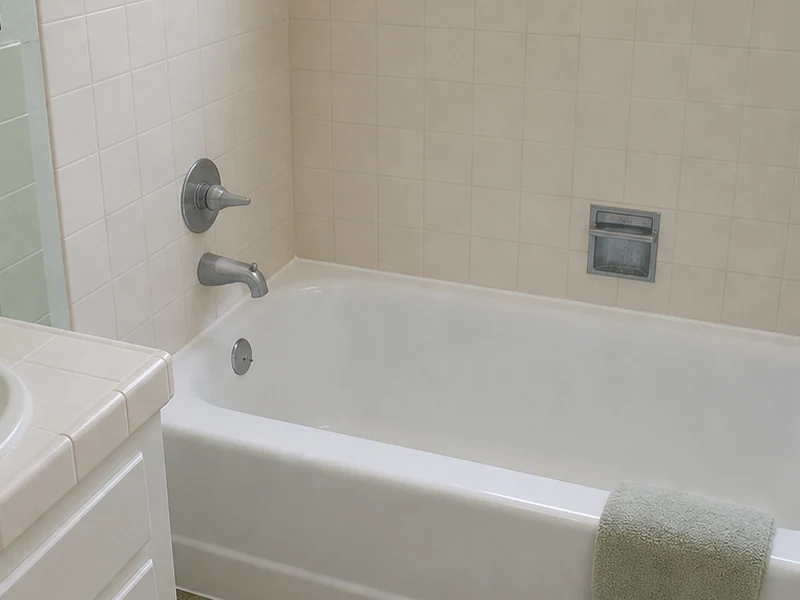
Step 7 — fresh re-caulk on the finished tub.
How prep changes by material
| Surface material | Prep method | Typical result |
|---|---|---|
| Porcelain over cast iron | Acid/silane etch + bonding primer + acrylic-urethane topcoat | Factory-smooth, 10–15 yr |
| Porcelain over steel | Etch + primer + topcoat | Smooth, durable, chip-resistant edges |
| Fiberglass / gelcoat | Scuff-sand + adhesion promoter + topcoat | Restores faded, crazed gelcoat |
| Acrylic | Solvent prep + flexible bonding coat | Even color, hides scratches |
| Cultured marble | Repair + primer + topcoat | Removes etching and yellowing |
| Ceramic tile | Clean/etch grout + bond coat + topcoat | New color without tear-out |
California safety & compliance, the part you do not see
Spraying a two-part coating inside an occupied Bay Area home is a regulated job, not a craft hobby, and Azamat Franklin runs it to the letter of California rules — which are stricter here than almost anywhere in the country. Three areas drive how we work in Concord: the coating chemistry we are allowed to spray, lead-safe practice on older homes, and the cure chemistry that makes respirator and ventilation discipline non-negotiable. None of it shows up in the finished gloss, but all of it is why a professional reglaze is a different animal from a kit off the shelf.
Low-VOC, CARB-compliant coatings and BAAQMD air rules
Coatings sold and sprayed in California have to meet the California Air Resources Board (CARB) statewide limits on volatile organic compounds (VOCs), and in our region the Bay Area Air Quality Management District (BAAQMD) — not the Southern California district — sets the local air rules we operate under. We spray CARB-compliant, low-VOC acrylic-urethane products built for this market, applied through an HVLP (high-volume, low-pressure) gun that puts far more material on the tub and far less into the air than an old high-pressure setup. Combined with masked containment and managed airflow, that captures overspray at the source instead of letting solvent vapor drift through your house. Choosing a compliant product is not a formality in Concord; the wrong high-VOC coating is both a regulatory problem and a tougher one to clear out of an interior bathroom safely.
EPA RRP lead-safe work on pre-1978 Concord homes
A great deal of Concord's housing — much of Clayton Valley, Sun Terrace, Holbrook and the older Ygnacio Valley streets — went up well before 1978, and pre-1978 homes can carry lead-based paint on bathroom walls, window trim and the painted exteriors of old cast-iron and clawfoot tubs. The federal EPA Renovation, Repair and Painting (RRP) rule, 40 CFR Part 745, governs how anyone disturbs that paint. When our prep could disturb suspect coatings on a home of that age, we treat it lead-safe: test or assume lead, set plastic containment, sand and scrape with HEPA-filtered capture rather than dry-sanding dust into the room, and clean up to a verified standard before we spray. A roll-on kit's instructions say nothing about any of this — which is exactly the risk of grinding on an old painted clawfoot exterior with no containment.
Isocyanate cure chemistry, Prop 65 and why DIY is riskier here
The reason a sprayed acrylic-urethane cures glass-hard is that it is a reactive two-part coating: the catalyst contains isocyanates, which are listed under California's Proposition 65 and are a respiratory sensitizer during application and cure. The vapor and atomized mist are the hazard, and they are most concentrated in the first 24 to 48 hours while the film cross-links. We handle that with a supplied-air or properly rated respirator, deliberate cross-ventilation, and a cure window where the bathroom stays closed off and unused. This is the single most underrated danger of a hardware-store DIY kit: a homeowner brush- or roll-applying a catalyzed coating in a small unventilated bathroom with a dust mask is exposed to exactly the chemistry the gear is meant to protect against. Doing it correctly is as much about the air in the room as the finish on the tub.
Reading the substrate, the failure modes, and when not to reglaze
Before any masking goes down, Azamat reads the fixture, because the substrate dictates the entire prep and a wrong guess is how finishes fail. The fast checks are simple. A magnet that clamps hard means cast iron or steel; a magnet that slides off means fiberglass or acrylic. Cast iron rings low and dull when you tap the rim and is far too heavy to rock; pressed steel rings higher and gives a little when you press the side; fiberglass and acrylic knock hollow. A chip that shows dark metal underneath is iron or steel, while a chip showing a paler resin layer is a fiberglass gelcoat. Age-of-home is the tiebreaker: a 1955 Clayton Valley ranch almost certainly holds porcelain over cast iron, while a 1990s build off Ygnacio Valley or in Northgate is overwhelmingly a molded fiberglass or acrylic unit.
That diagnosis matters because the real failure modes all trace back to the substrate-prep match. The big one is adhesion loss — delamination — where the coating peels in sheets because the surface still had soap film or body oil on it, because glass-hard porcelain was never etched so the primer had nothing to key into, or because a fiberglass shell was scuff-sanded but the wrong adhesion promoter (or none) went down. Contamination is its cousin: silicone from old caulk, a polish residue, or a cleaner film left behind will reject a coating in a localized patch even when the rest of the tub bonds fine. Improper etch or an out-of-window cure shows up as a finish that looks right for a month and then crazes or stays tacky. And the quiet one is wrong product on wrong material — a rigid coating sprayed over a flexing fiberglass floor that cracks the first time someone steps in. Azamat works the diagnosis backward from the symptom: a tub peeling only at the drain points to a leaking overflow gasket, peeling in full sheets points to a missed etch or a dirty surface, and crazing that telegraphs through points to substrate movement that should have been reinforced first.
The honest part of the trade is knowing when a coating is the wrong answer. We will not reglaze a fixture that has a structural problem a finish cannot carry. A cast-iron tub rusted clean through at the drain or overflow, a fiberglass floor that crunches or visibly delaminates underfoot, a shell cracked all the way through, or a cultured-marble top so heat-blistered the surface is lifting — those get a straight recommendation to replace, not a coating sprayed over the problem. On a high-end or rare fixture still in production, we will sometimes point you back to the manufacturer for a factory part or panel instead, because matching their spec outlasts anything we could spray on site. Turning a job away is not lost work; it is the reason the jobs we do take carry a warranty we can stand behind.
The warranty behind the work
Every reglazing job we do in Concord comes with a written 5-year warranty covering workmanship and finish — peeling, blistering and adhesion failure under normal household use. That warranty is only possible because we do not cut the prep. We are fully licensed and insured, and the crew that preps your tub is the crew that sprays it; nothing gets handed off to a subcontractor halfway through.
To keep the finish in warranty and looking new for its full 10-to-15-year life, the care is simple: let it cure fully before first use, clean it with a soft cloth and a non-abrasive cleaner, skip scouring powders and steel wool, and use a bath mat without suction cups. We leave all of this in writing on the care sheet. You can see what the finished work looks like in our before & after gallery, check the all-in numbers on the pricing page, or read how it held up in neighbors' homes on the reviews page.
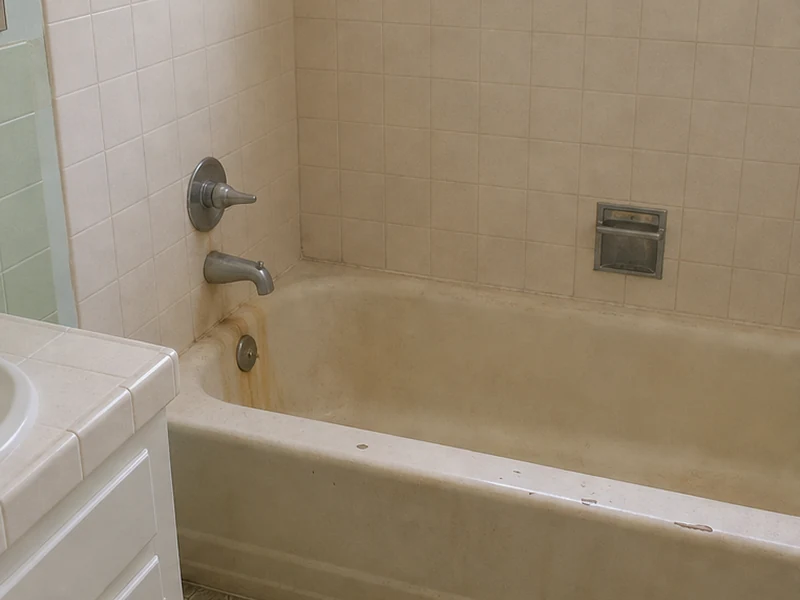
The result this process delivers
Same cast-iron tub, before and after the seven steps. Tap to compare.
Process FAQ
Can you reglaze over old tile, or only tubs?
Both. The same prep-and-spray sequence works on a tub surround or wall tile: we clean and etch the glaze and grout, lay a bond coat, then spray the acrylic-urethane topcoat. It gives the tile a new color without tearing it out.
Why does prep matter so much?
Prep is the whole job. Etching, scuff-sanding and priming are what bond the new coating to the old surface. Skip them and the finish peels, which is exactly why DIY kits and rushed jobs fail.
How do I care for the finish to keep it in warranty?
Let it cure fully before first use, clean with a soft cloth and a non-abrasive cleaner, skip scouring powders and steel wool, and use a bath mat without suction cups. We leave all of this on a written care sheet.
What coating do you spray?
We spray a professional acrylic-urethane topcoat in multiple coats over a bonding primer. It cures to a hard, glossy, factory-smooth finish that lasts 10 to 15 years.
What does the warranty cover?
Every job carries a written 5-year warranty on workmanship and finish — peeling, blistering and adhesion failure under normal use. We are fully licensed and insured.
Ready to book your one-day reglaze?
Open Mon–Sat 7:30 AM–6 PM. Written 5-year warranty. Fully licensed & insured.